I have officially crossed over to WordPress.org! Please be sure to visit me at my new site, Pretty Polymath! If you are following me on wordpress.com, don’t worry, you’ll still be able to see all my posts on the reader! 🙂
Author: prettypolymath
Cabbage Carrot Stir- Fry (Guest Post by The Odd Pantry)

Cabbage-carrot anti-curry
Greetings, readers of the Pretty Polymath! Thank you so much Hetal for thinking up this wonderful idea.
For those who have not run into my blog before, my name is Aneela and I blog at The Odd Pantry. I write about food with a focus on regional Indian; I frequently wander off into cultural or scientific claptrap; and lately I’ve been exploring the science and social impact of genetically modified crops. I can cook, I can write, and I’ve been known to take the occasional mediocre-to-decent photo. But here is the message I want you to take away from this guest blog, even if you forget my name and my blog address and never think about cabbage nor carrot again in your lives — I hate curry! No, I don’t hate the dish or the dishes that are called by that name. But I hate that word!
 My problem with the word is that it can mean whatever you want it to mean. For Westerners who know Indian food mostly through restaurants, curry means a gloopy reddish-brown dish with random stuff floating in it. An Indian cook who is intimately familiar with the simplicity of home cooking might apply that word to a basic cabbage stir-fry that has perhaps some turmeric or tomatoes thrown in. She might call that a curry because that is the word people use to describe her cuisine, not realizing that by calling it that others are imagining an undecipherable gloop, completely inaccessible in its methods and its ingredients. You spend maybe 15 minutes in your kitchen in a procedure that is simplicity itself; but people are hearing elephants trumpeting and sitars buzzing and Emperor Akbar’s marble kitchen firing up the tandoor.
A word that means everything means nothing. If you want to know how this word came to be, please read this public service blog post I did a while ago.
Anyway. If this tempts you enough to want to visit my site and perhaps leave a comment or two, maybe click around hither and thither, and subscribe yourself and some spouses and children and distant cousins to boot, I would not be averse to it. Really, I wouldn’t.
Cabbage-carrot anti-curry
This is a very simple stir-fry that I grew up eating. In my family we had this with chapatis or rice about once a week. We made it solely with cabbage, but here I have thrown in some julienned carrots for color and added nutrition. It is a fantastic, simple, quick dish to put together as you will see. My main goal is to demystify Indian food for people who perhaps are still intimidated by the thought of having to purchase many spices. This one only uses a few.
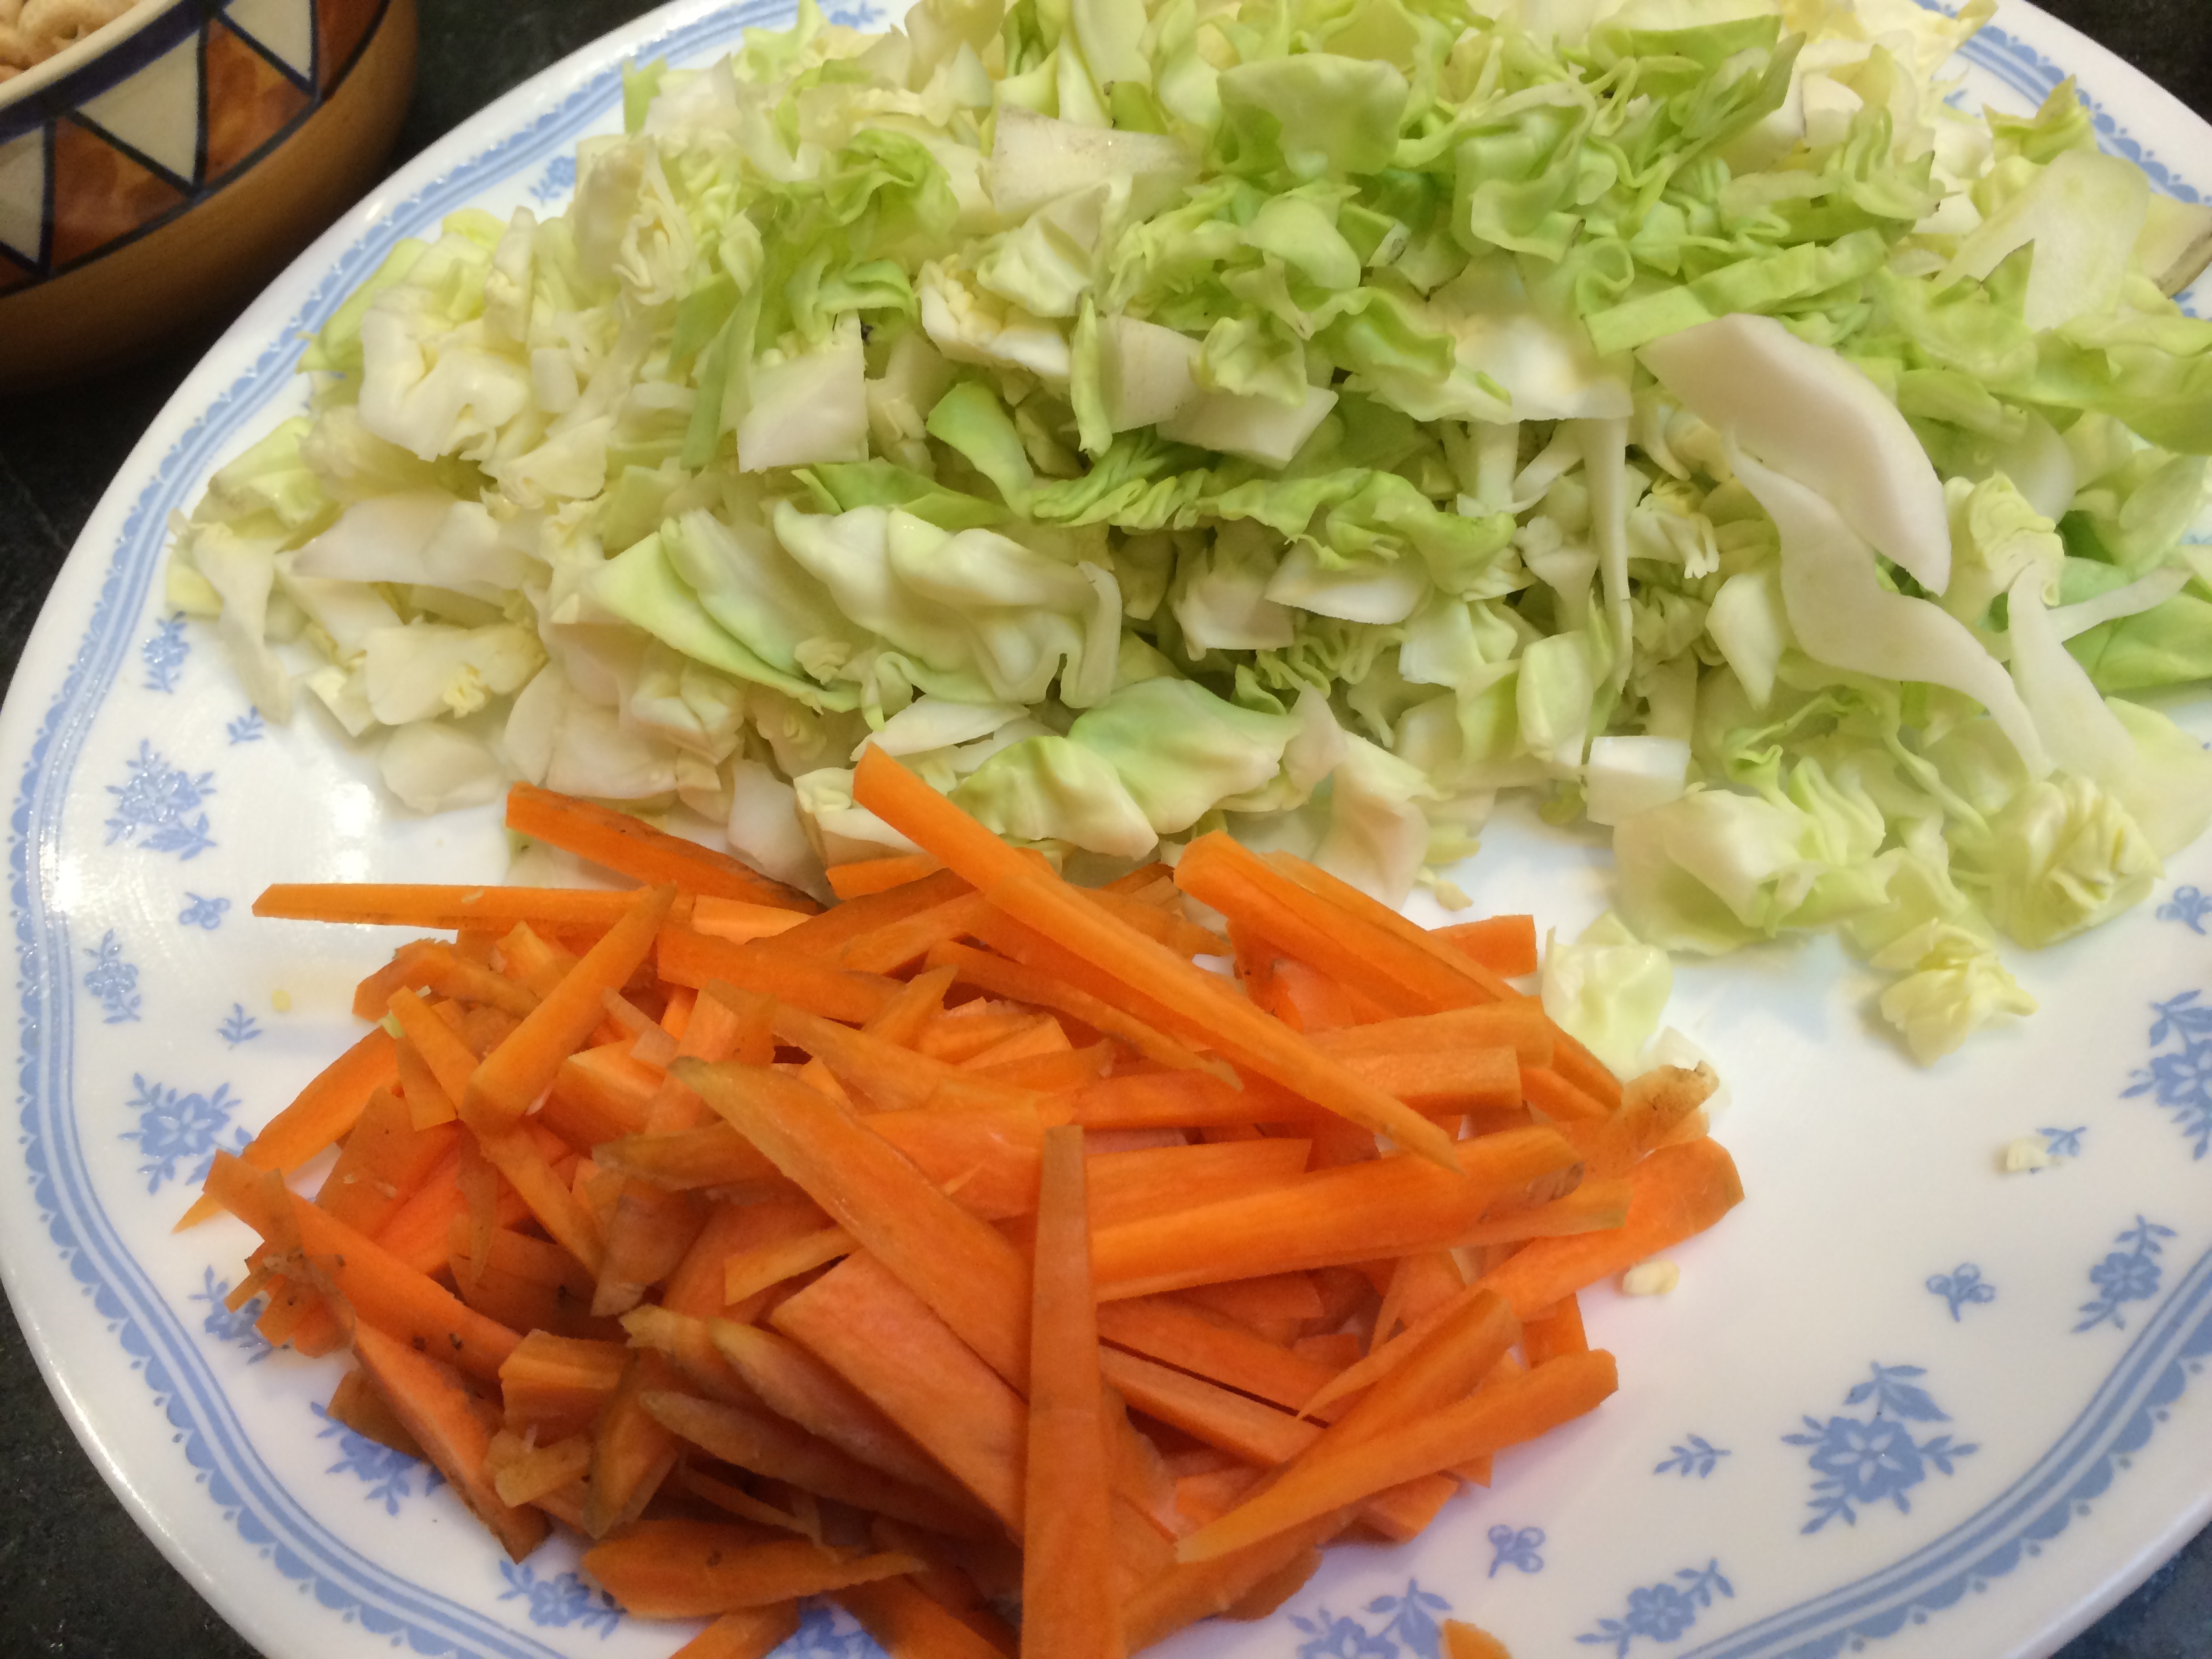
Shredded cabbage, julienned carrot

All the spices

Chili and garlic frying

In the pot

Add powdered spices

Done
Cabbage-carrot Stir-fry
Ingredients:
- Half a head of cabbage shredded, or, third of a head of cabbage and couple carrots, julienned
- 3-4 cloves garlic, minced
- 1-4 fresh green chilies, according to your heat preference, sliced thin
- 1 teaspoon mustard seeds
- 1 teaspoon coriander powder, freshly ground if possible
- 1/4 teaspoon turmeric powder
- 1/2 teaspoon salt
- 2 tablespoons oil
Method:
Heat the oil in a wide, thick-bottomed pan on a medium-high flame. When it shimmers, put in the mustard seeds. They will soon pop. Then?add?in the chilies and the garlic. Wait till the chilies look blistered and the garlic looks shriveled. Then it is time to add the cabbage and carrot.?Toss it around to cover with oil. Let it cook on medium-high for about 5-7 minutes, stirring occasionally, until the vegetables have shrunken down some, and possibly some pieces show edges of brown. Now is the time to add the dry spices and the salt and stir nicely. Cover, turn the heat to medium-low, and let it cook for another 5-7 minutes and you are done.
Berry Almond Cake and Blog Update!

You ever have days were you just want to bake a cake for no special reason at all? I’ve been seeing so many mouthwatering berry cakes on Pinterest that I just had to bake one for myself. This almond cake is one of my favorite cakes to bake. It’s not too sweet and I love the hint of lemon. I usually pair it with a light whipped cream and a berry compote to make the perfect summer dessert. I even got to use blackberries from my garden in the compote this time! The final product looks so pretty and rustic! It has very little sugar in it and is super refreshing. It was a hit with my family and I promise your family will love it too! Try it for yourself!
Also I am officially moving from WordPress.com to .org (blog post on how to switch to come soon!) If you are following me through WordPress.com please sure to follow me via email (check my right bar) so I don’t lose you! See you guys on the other side 😉
Cook time: 2 hours Makes: one 9 inch cake
Almond Cake
12 tbsp. butter, room temperature
3/4 cup granulated sugar
3/4 cup all-purpose flour
1 tsp baking powder
¼ tsp salt
3/4 cup almond meal
zest of 1 lemon
3 eggs
Whipped Cream
1 cup heavy cream
2 tbsp. sugar
1 tsp vanilla essence
Berry Compote
1.5 cup mixed berries
¼ cup water
1 tbsp. honey
½ tbsp. lemon juice

1. Pre-heat the oven to 360 F
2. In a large mixing bowl, stir the butter, sugar, flour, baking powder, salt, almond meal, lemon zest and eggs together until you have a nice thick batter. Grease a 9-inch cake pan and pour the batter in. Bake for 40 minutes or until an inserted toothpick comes out clean. Cool the cake on a rack until completely cold and then refrigerate for at least 30 minutes.
3. While the cake is baking, make the berry compote. In a small saucepan, bring water and lemon juice to a simmer. Add the honey and stir until it is all dissolved. Add the mixed berries (I used strawberries, blackberries and blueberries) and cook on low heat for about 5 minutes until the berries just start to break down. Let this cool completely.
4. Next, in a cold mixing bowl, whisk heavy cream, sugar and vanilla until you have stiff peaks. This took me about 2 minutes with my stand mixer on medium speed.
5. Now take your cake and cut it in half. It’ll be a bit crumbly but don’t worry, it’ll stay together as long as you are gentle. Brush on some of the juice from the berry compote on top of the bottom layer. Then take half the whipped cream and spread it evenly on top. Put the second layer of cake on top of the bottom layer. Spoon the berries on top of the cake and decorate with more whipped cream, fresh berries and dust with powdered sugar. Be sure to eat this cake the day you make it, otherwise the berries will make the cake slightly soggy and that isn’t good eats. Enjoy!

August Daring Baker Challenge- Chimney Cakes

The August Daring Bakers’ Challenge took us for a spin! Swathi of Zesty South Indian Kitchen taught us to make rolled pastries inspired by Kurtoskalacs, a traditional Hungarian wedding pastry. These tasty yeasted delights gave us lots to celebrate!

This month my husband and I are celebrating our 1 year anniversary! Over the year we learned that our favorite thing to do together is to just lay in bed and enjoy each other’s company and these chimney cakes looked like the perfect lazy Sunday dessert. The hubby and I LOVE lazy Sundays. We watch crappy reality shows ( I’m looking at you Married at First Sight) sit in bed and just relax. When I first saw this month’s challenge I was like ” vertical cinnamon buns?” Whhhaaa! I actually wasn’t too far off. The yeasted bread has a very similar flavor and texture to the outside of a cinnamon bun. I topped my cakes with cinnamon sugar,melted chocolate and walnuts. They look pretty difficult to make, but I promise you it’s actually super easy! Try it for yourself!
Cook time: 2 hours Makes: 4 small cakes
For the dough:
1 packet of active dry yeast
1/2 cup milk, (120-130 F)
1/2 tsp sugar
1¾ cups all-purpose (plain) flour
2 tbsp sugar
1/8 teaspoon salt
1 large egg, room temperature
3 tbsp melted butter
For baking:
melted butter
sugar
For the topping:
½ cup (3½ oz) (100 gm) sugar
1 cup (4 oz) (115 gm) ground walnuts
2 tbsp. melted chocolate
2 teaspoons (10 ml) (1/4 oz) (6 gm) cinnamon

1. Mix yeast, milk, 1/2 tsp of sugar in a small bowl and let it sit for 10 minutes or until foamy.
2. In a separate bowl, mix the flour, salt and 2 tbsp of sugar. Add the dry mixture to the yeast mixture with the egg and melted butter. Mix the dough with a spoon until everything is incorporated. The dough will be VERY sticky. Don’t add any flour to it. Spoon the dough into a large greased bowl and cover. Let the dough rest in a warm area for 1 hour or until it doubles.
3. Take a rolling-pin or cardboard paper towel tube and cover with 3 layers of foil. Brush melted butter on to the rolling-pin/tube to prevent the dough from sticking.

4. Pre-heat the oven to 375 F.
5. Split the dough into 4 equal portions ( ~4 oz each). Roll the dough out on a floured surface with a greased rolling-pin until it is about 8 inches in diameter (1/6 inch thick). Cut the dough with a sharp knife into a swirl pattern leaving the strip of dough at least 1/2 inch wide. Wrap the dough around the foiled rolling-pin/tube and roll over sugar lightly until the dough is pressed together.
6. If you are using a cardboard tube then just stand them up on a baking sheet. Otherwise, place the rolling-pin on to a roasting pan so that the pins rest on the edges of the pan. Bake for 21 minutes or until nice and brown. Make sure to turn the rolling-pin/tube halfway through the baking process.

7. One baked, brush melted butter on to the cake and top with whatever you like. I sprinkled cinnamon on one and rolled another in chocolate an walnuts. Tap the mold on to a plate until it released and cool vertically. Enjoy!
Salted Caramel Smoothie Video with The Divine Hostess
I mentioned last week that Fifi from The Divine Hostess would be doing a video for the salted caramel smoothie recipe and here it is! I have a small cameo towards the end 🙂 Check it out !
Mango, Peach and Strawberry Smoothie (Guest Post by Ellaphant Eats)

Hi again Pretty Polymath readers! I’m back and this time have a tropical perfect-for-end-of-summer smoothie to share with you. I have been receiving a CSA every Tuesday all summer long from a local farm here in Pittsburgh. It includes so many farm-fresh fruits and veggies and this past week I received huge ripe peaches and beautiful strawberries. What better way to enjoy them than create a cold, delicious treat? (Ok confession I originally wanted to make a strawberry peach tart but shuddered at the thought of turning on my oven). Smoothies have been a staple in my diet for years now (i start every morning with a green one!) so it’s super refreshing to have one for dessert to avoid all of the refined sugar.
The best part of this smoothie is you can switch up the base to whatever you have on hand. I used almond milk but you can use coconut water, orange juice, or water if that’s all you have. Also fresh OR frozen fruits can be used – just be sure to cut down on the ice if all your fruits are frozen.
Enjoy!
Recipe:
Makes: 1 large or 2 small smoothies
Ingredients:
- 1 cup almond milk or water
- 1 ripe peach, sliced into large chunks
- 3/4 cup chopped mango (i used frozen because slicing a mango is a feat I don’t think I will ever manage)
- 3/4 cup quartered strawberries
- 2 tsp coconut oil (mine is in a constant liquid state due to the heat)
- 1 Tbsp honey
- 1/2 – 1 cup ice
1. Place all ingredients in a blender, blend on high, serve, and enjoy!
Check out more healthy recipes and tips on Ella’s blog Ellaphant Eats. Also be sure to check out her :
Salted Caramel Smoothie (Guest Post by The Divine Hostess)

Hi everyone! This week I have two AWESOME guest bloggers giving us delicious smoothie recipes. The first recipe this week is from Fifi aka The Divine Hostess . You guys might remember her from our Vegan Burgers an Fries collaboration on Youtube last year and my weekend visit with her vlog video! She came up with this DELICIOUS salted caramel smoothie recipe and I was lucky enough to be in LA when she was filming it and got to see her in action! Try it out for yourself 🙂
August isn’t even over yet, but I can already feel summer ramping down. Soon there will be less time bumming around on the beach, and more time spent rushing to do important business, going back to school and just getting back into the groove of things. With an on-the-go lifestyle, it is easy to put healthy eating on the back-burner. This is why smoothies are so great! They are nutritious, yummy, and save you from standing in that long Starbucks line in the morning before work or school. One of the most delicious flavors at Starbucks is salted caramel– the bold sea salt and the sweet home flavor of caramel are just a match made in heaven!
My salted caramel smoothie has all the delicious flavor, but without refined sugar and get this– no animal products. This makes it great for lactose intolerant people and ensures the smoothie can last a couple hours without spoiling!
You will need:
- 2 frozen bananas
- 12 ounces (1.5 cups) of almond milk (unsweetened)
- 6-8 dates
- 1/2 tsp sea salt
- 1/4 cup coconut shreds
- 1 tsp coconut oil
If you do not have a powerful blender, soak the dates in a 1/4 cup of warm water for at least 2 hours before blending. Add all contents into blender and blend until smooth. Top the smoothie with additional sea salt for extra flare. Enjoy!
Check out more healthy recipes and tips on Fifi’s blog The Divine Hostess. Also be sure to check out her:
Also Fifi will be releasing a video for this smoothie this Friday on her Youtube channel so be sure to check it out!

Behind the scenes of Fifi’s video!
Dudhi No Halwo (Bottle Gourd Halwa)

I’m currently in Jersey visiting my family and along with my food goals of stuffing my face with as many jersey bagels as I can, I also wanted to take advantage of my family’s garden. As long as I can remember, my family has grown hoards vegetables. Eggplants, long beans, okra,tomatoes, various herbs, you name it we grew it. One of my favorite veggies we grow is bottle gourd. They grow to be super long and my sister and I would pretend they were baseball bats and try to beat each other. We had a violent way of showing we loved each other when we were little 🙂 .

My mom happily harvesting the sacrificial bottle gourd for our dudhi no halwo
Anywho, luckily this year we had a surplus of bottle gourd! In past years, my mom would shove bottle gourd in everything. Bread, dumplings, curries,juices (yes, my sister and I don’t like to talk about this torture juice) and sweets. Dudhi no halwo is actually a sweet. Halwa or halwo is a dense, oatmeal-like dessert that can be made with carrots, bottle gourd and various nuts and flours. It’s a dessert that is pretty typical all across the middle east and there are SO many versions of halwa. This recipe is a Gujarati version. It’s super easy to make and delicious with carmel-y flavor to it. If you don’t have bottle gourd near you, try this with carrots and add some walnuts and cinnamon to it and you have guilt free carrot cake halwa! Enjoy!
Cook time: 30 minutes Serves: 4-6 people
1 tbsp ghee (clarified butter)
2 cups shredded bottle gourd
3 tbsp of sugar
1 cup heavy cream
1 tbsp crushed pistachio
1 tsp ground cardamom
1. Melt the ghee in a thick bottomed saucepan. Add the shredded gourd and let it cook for roughly ten minutes on medium heat until the gourd is translucent and soft.
2. Once the gourd is cooked stir in the sugar and let it cook until the water from the gourd has evaporated. Now pour in your heavy cream and continuously stir. Make sure to keep stirring or else it will burn. Keep mixing until the majority of the heavy cream has evaporated and the ghee separates from the gourd.
3. Remove from heat and sprinkle the halwo with crushed pistachios and cardamom. Enjoy while warm or cold. This will keep in the fridge for up to four days.

Mango Ice Cream (No Machine)

My mom recently got a shipment of mango puree (rus) from her sister’s farm in India. My mom couldn’t wait for me to try it now that I’m in New Jersey visiting home for a bit. Indian mangoes are amazingly fragrant with a floral aftertaste. It’s unlike any other mango I’ve ever had. They aren’t fibrous either, which means no using mangoes as floss. Because of this the pulp is super smooth. Once I tasted the rus, I knew I had to use it in an ice cream recipe. If you don’t have access to an Indian grocery store where you can buy a can of rus then just blend the pulp of two mangoes really well. The ice cream came out super creamy and light. This recipe is SO easy and you don’t need a ice cream machine/churner!
Cook time: 10 minutes, but lots of waiting Makes: 4-6 servings
1.5 cups mango puree
1 cup heavy cream
1 tbsp granulated sugar
juice of 1/2 lime
crushed pistachios (optional)

1. In a large bowl, whip up the heavy cream and sugar with a whisk until you have stiff peaks. Don’t go too crazy, otherwise you’ll have butter. I mixed mine with a stand mixer with the whisk attachment on medium for 1 minute and high to 2 more minutes.
2. In a separate large bowl, mix together the mango puree and lime juice. Add 2 dollops of the whipped cream into the mango puree and mix in well. Add the rest of the whipped cream and fold in gently until all the whipped cream is mixed in. Don’t go nuts mixing this otherwise you’ll lose the fluffiness of the whipped cream.
3. Pour the mixture into a pan and give the pan a few taps on the table to let out the air bubbles. Sprinkle with crushed pistachios and cover with plastic wrap. The plastic wrap should touch the top of the ice cream. Freeze for at least 4 hours.
4. After 4 hours are up take the ice cream and put it in a blender. Blend until it’s creamy and pour into you’re final container and cover with plastic wrap, making sure the top of the ice cream is touching the plastic wrap. Blending helps make the ice crystals smaller which leaves you with a smooth and creamy ice cream. Freeze for 2 hours and enjoy!
TIPS:
- You can use any type of fruit puree to make this into whatever flavor you want! Peach puree will be my next attempt. What flavor would you do?
- You can add spices to the whipped cream to add a little more flavor to the ice cream. Next time I plan on adding saffron and cardamom to it.

Visiting LA and Vlogging with The Divine Hostess and Simply Bakings!
This weekend I got to hang out with my favorite Youtubers, Fifi (The Divine Hostess) and Lainey (Simply Bakings). Check out Fifi’s vlog where we navigate the labyrinth that is Whole Foods, eat yummy food, and I get schooled on how food vloggers work!
